Creating Events
Adding an Event
Event Management Module
1. Click on the Event Management Module
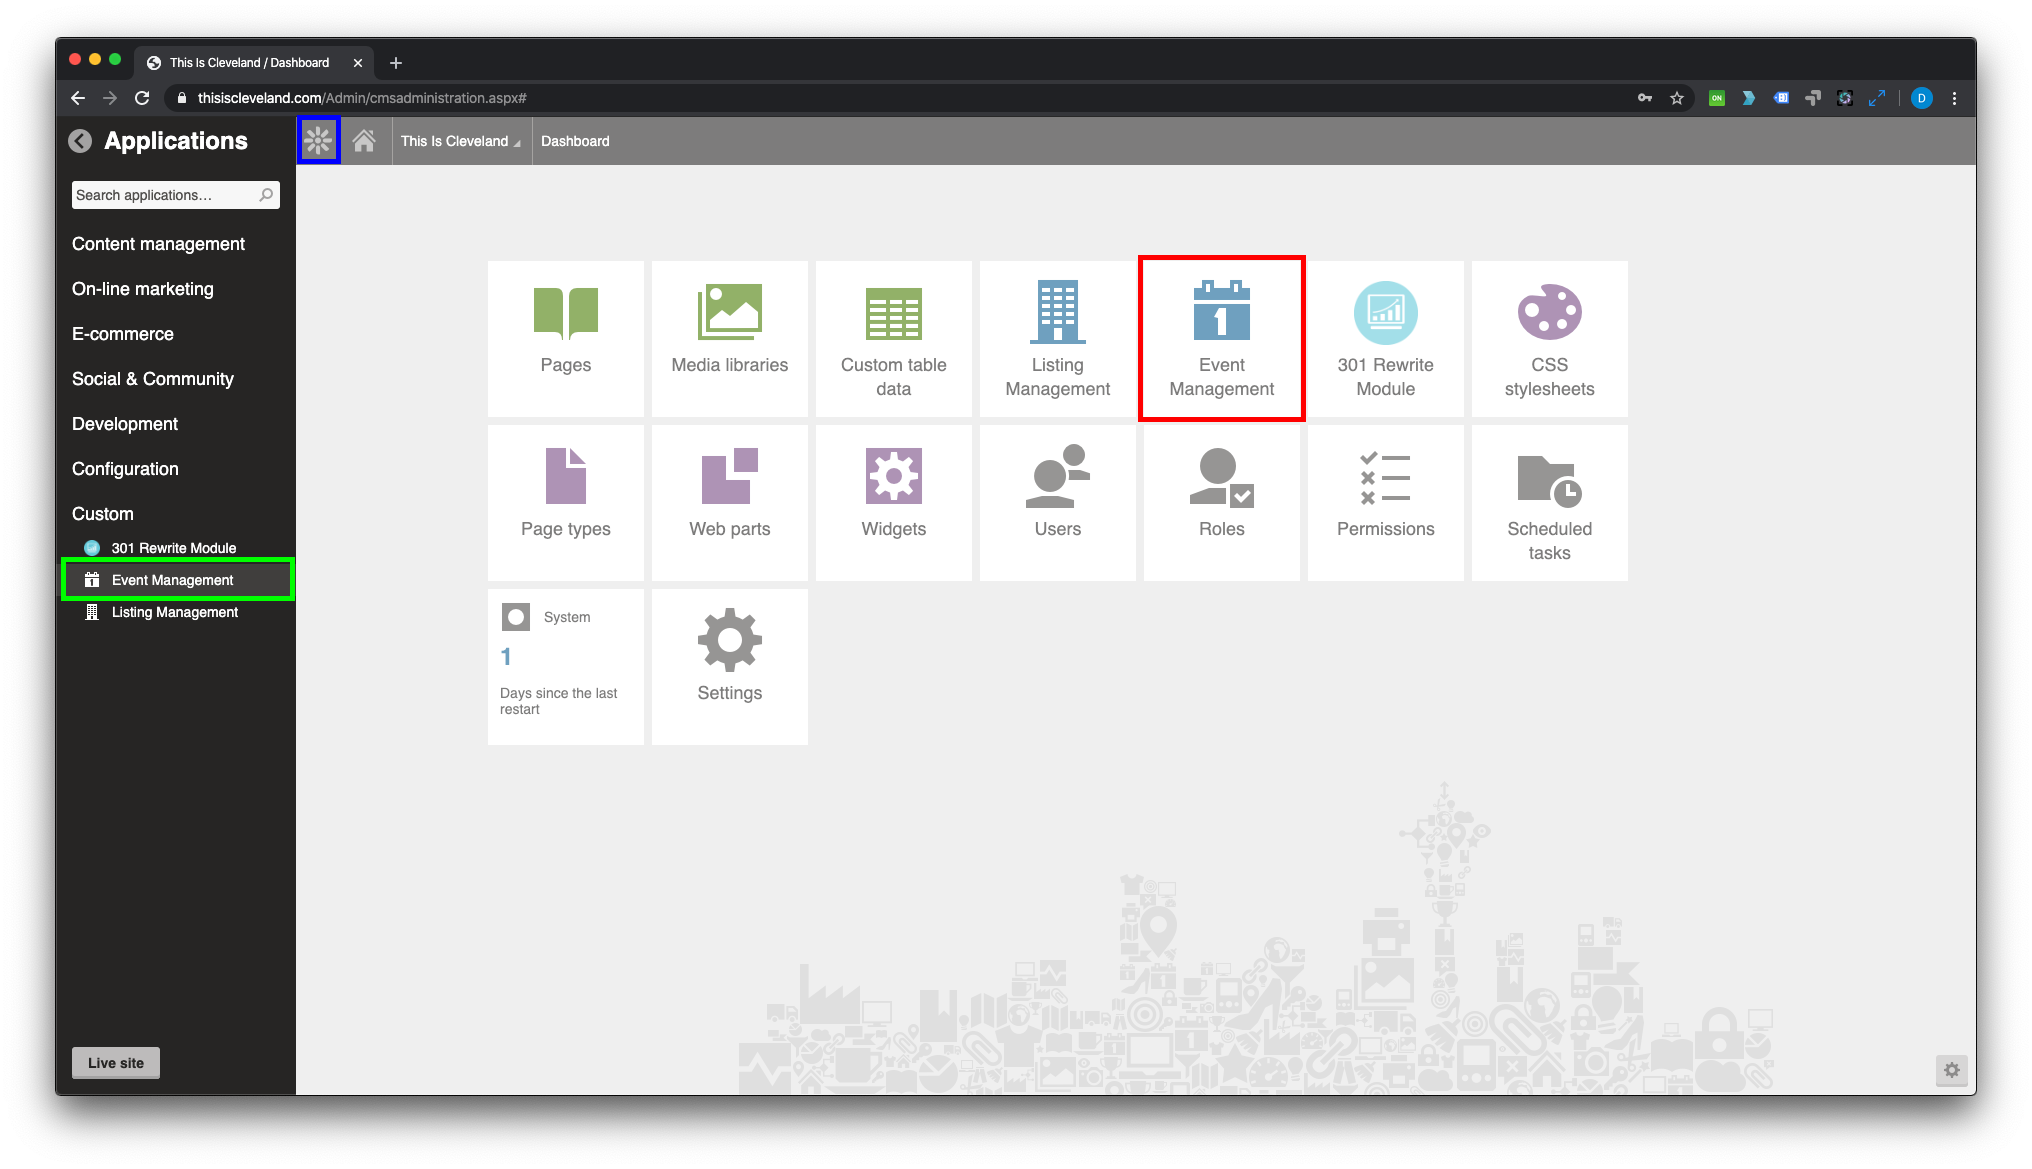
This can be found on your Kentico home screen if it is pinned (red) or by clicking on the Kentico Menu (blue) and navigating to Custom > Event Management (green).
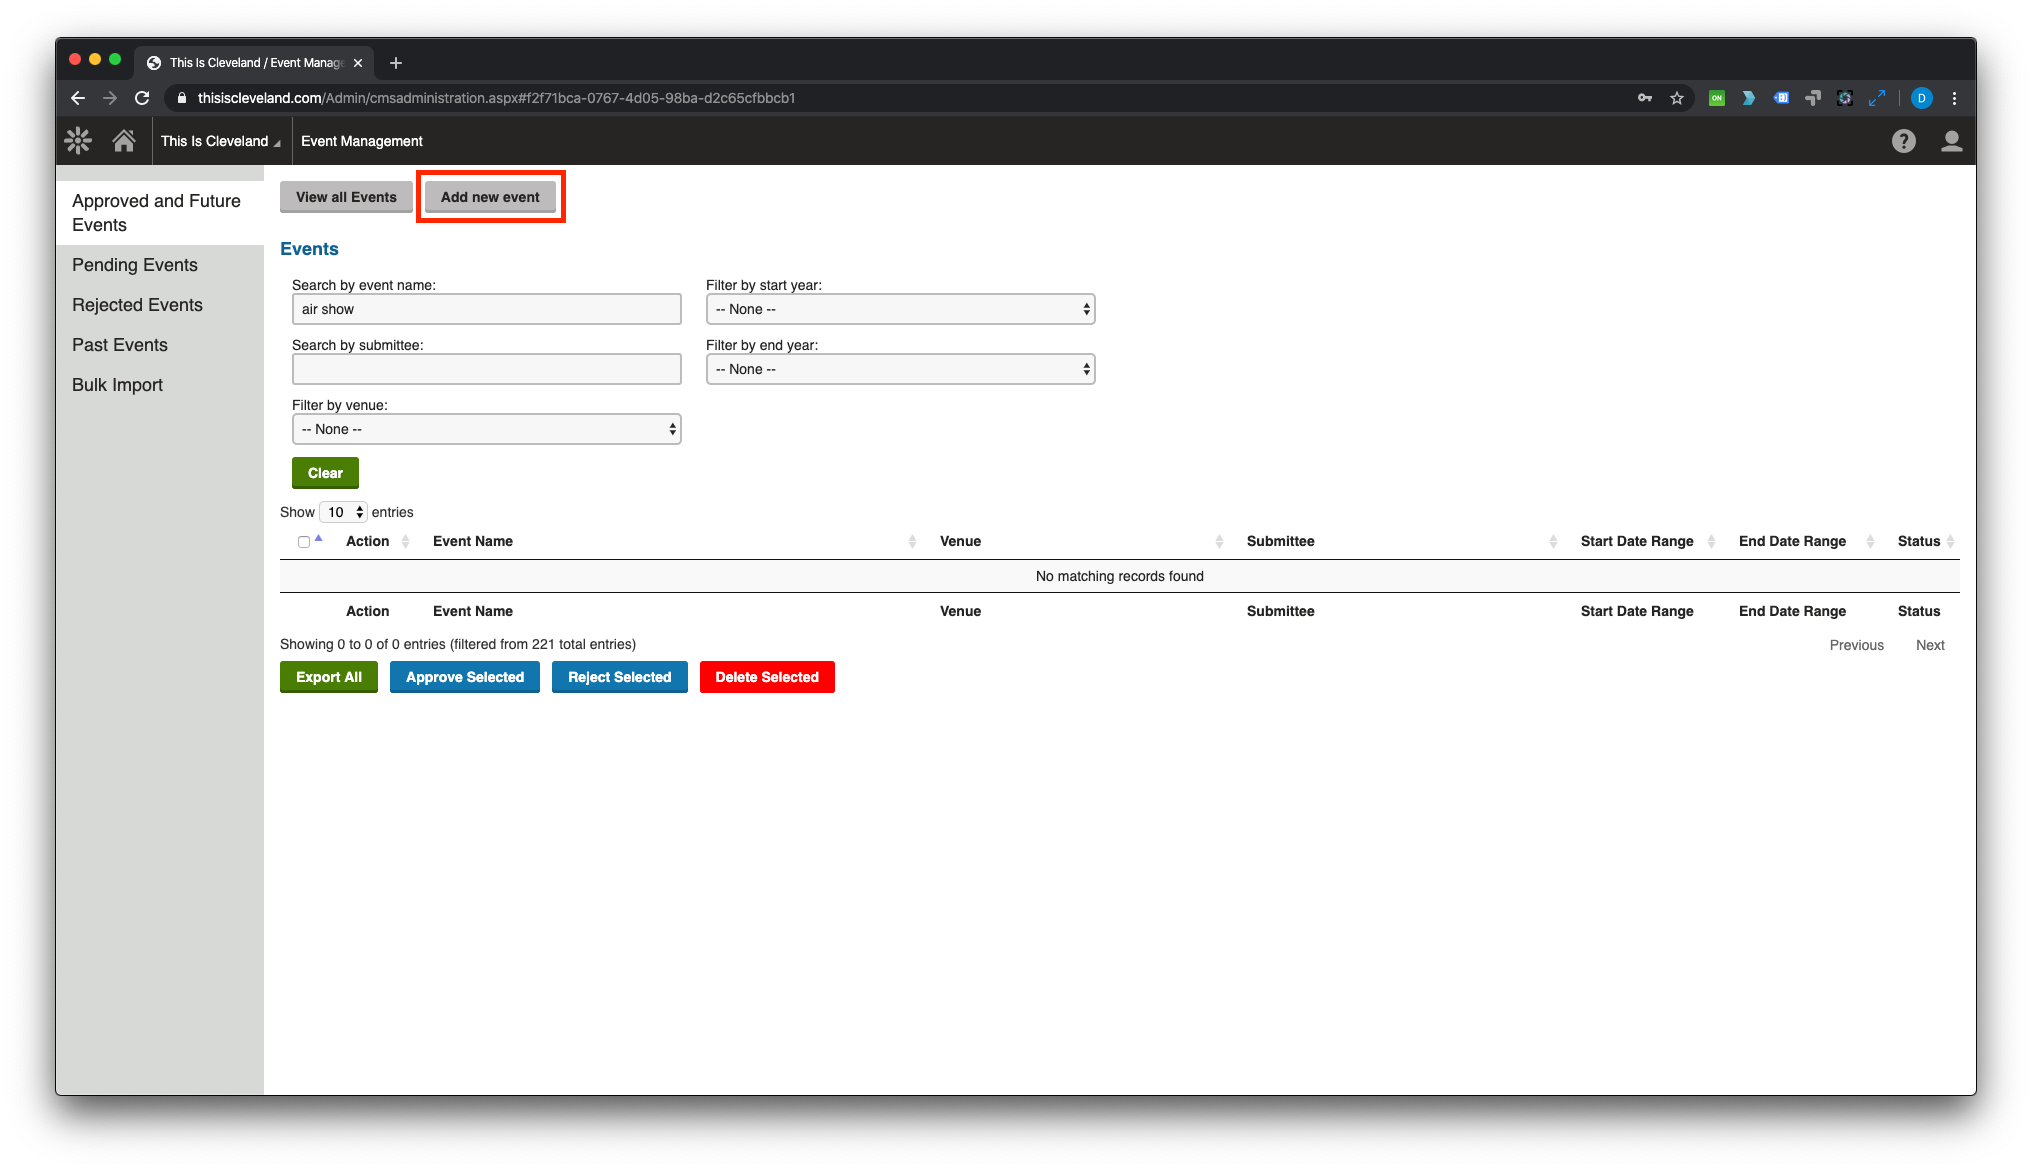
2. Click on the "Add new event" button (red) at the top of the page.
3. Enter the event content in the appropriate fields.
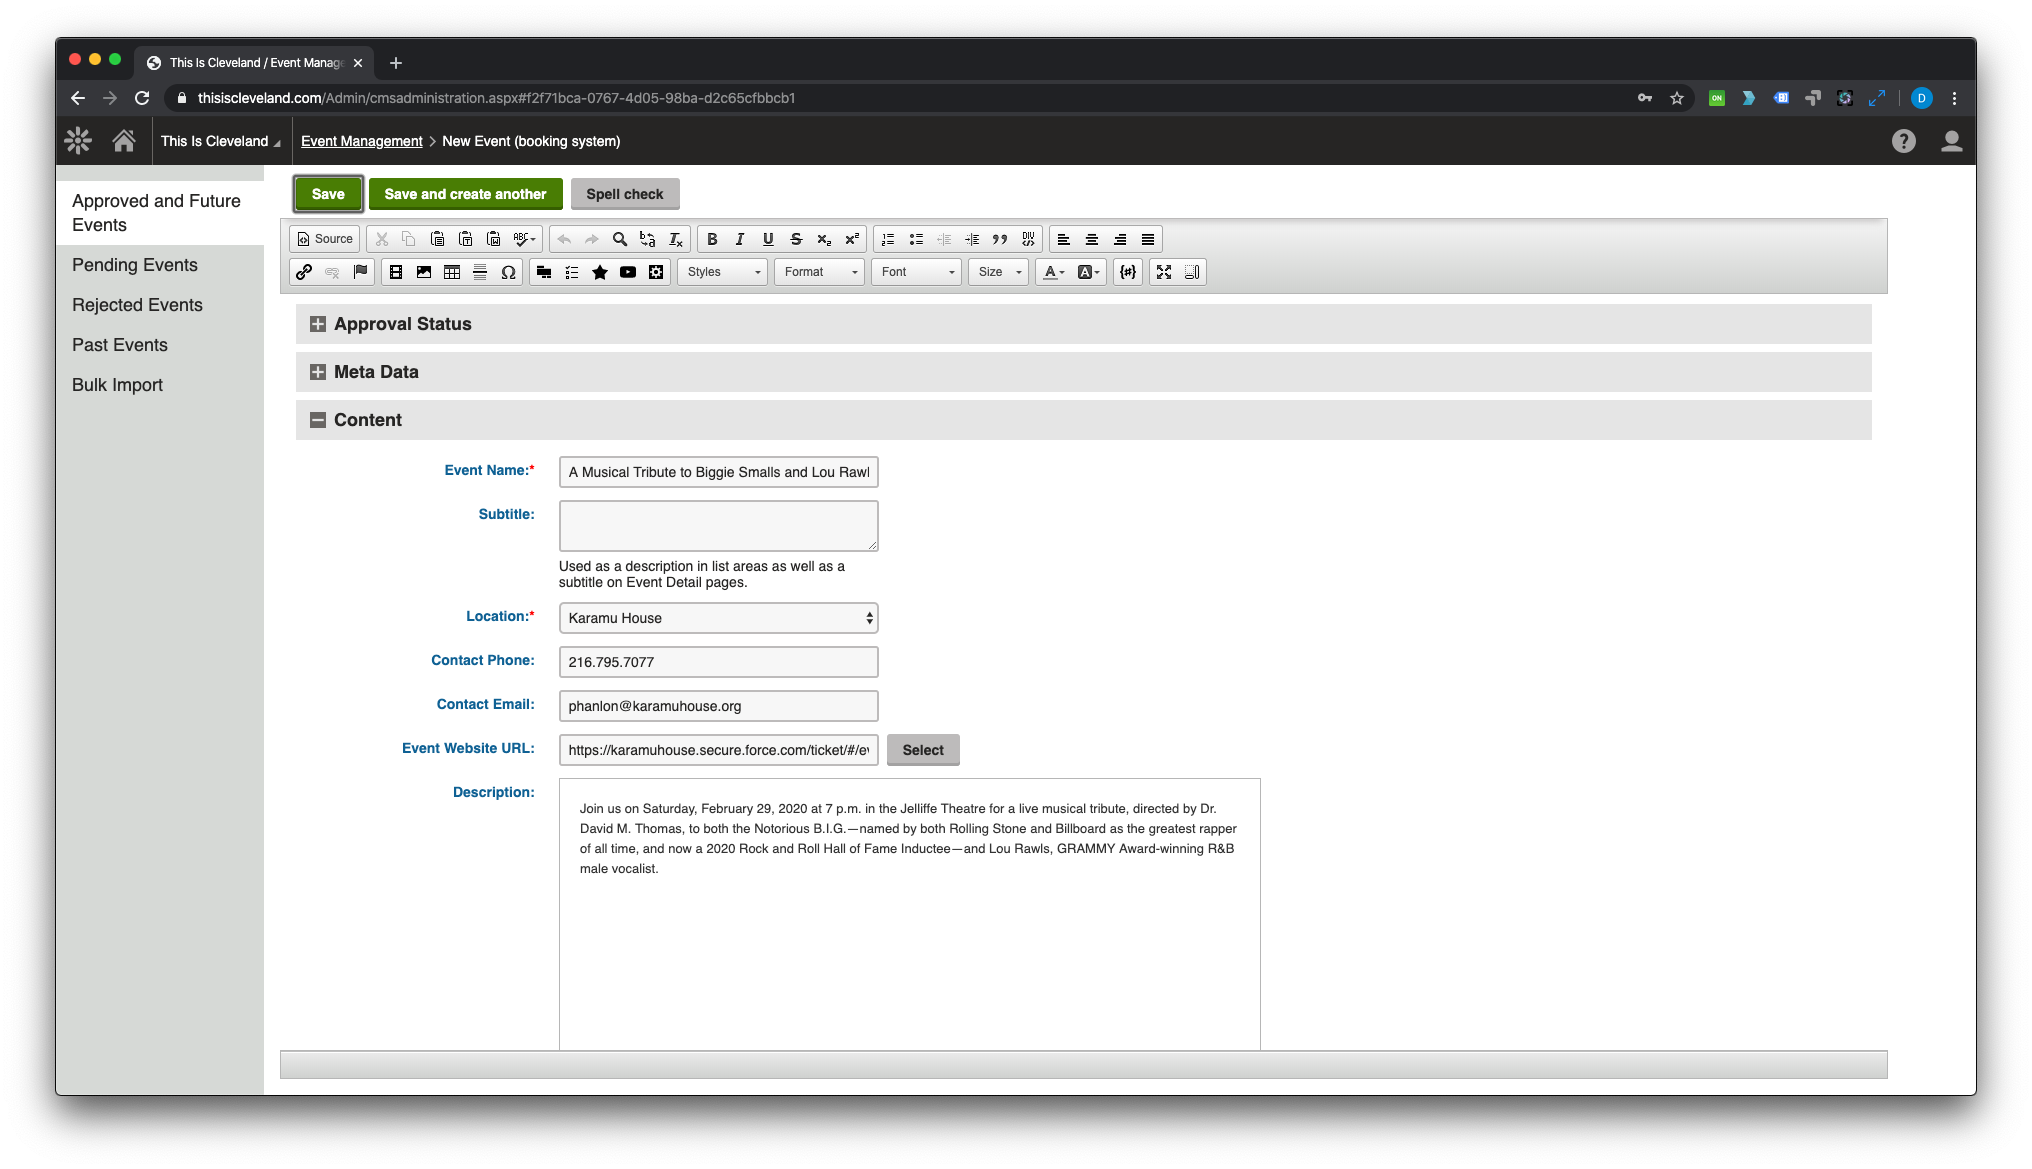
| Event Name | Because the event detail page's URL is generated from the event name avoid using symbols in the event name. Remember to include the year for the event if it occurs annually (ex: Winterfest 2020). |
| Contact Phone | Phone numbers should be in the following format XXX.XXX.XXXX (ex: 216.875.6690). |
| Event Website URL | Always include http:// or https:// in the URL (ex: https://www.thisiscleveland.com). |
4. Enter the date/s and time/s for the event.
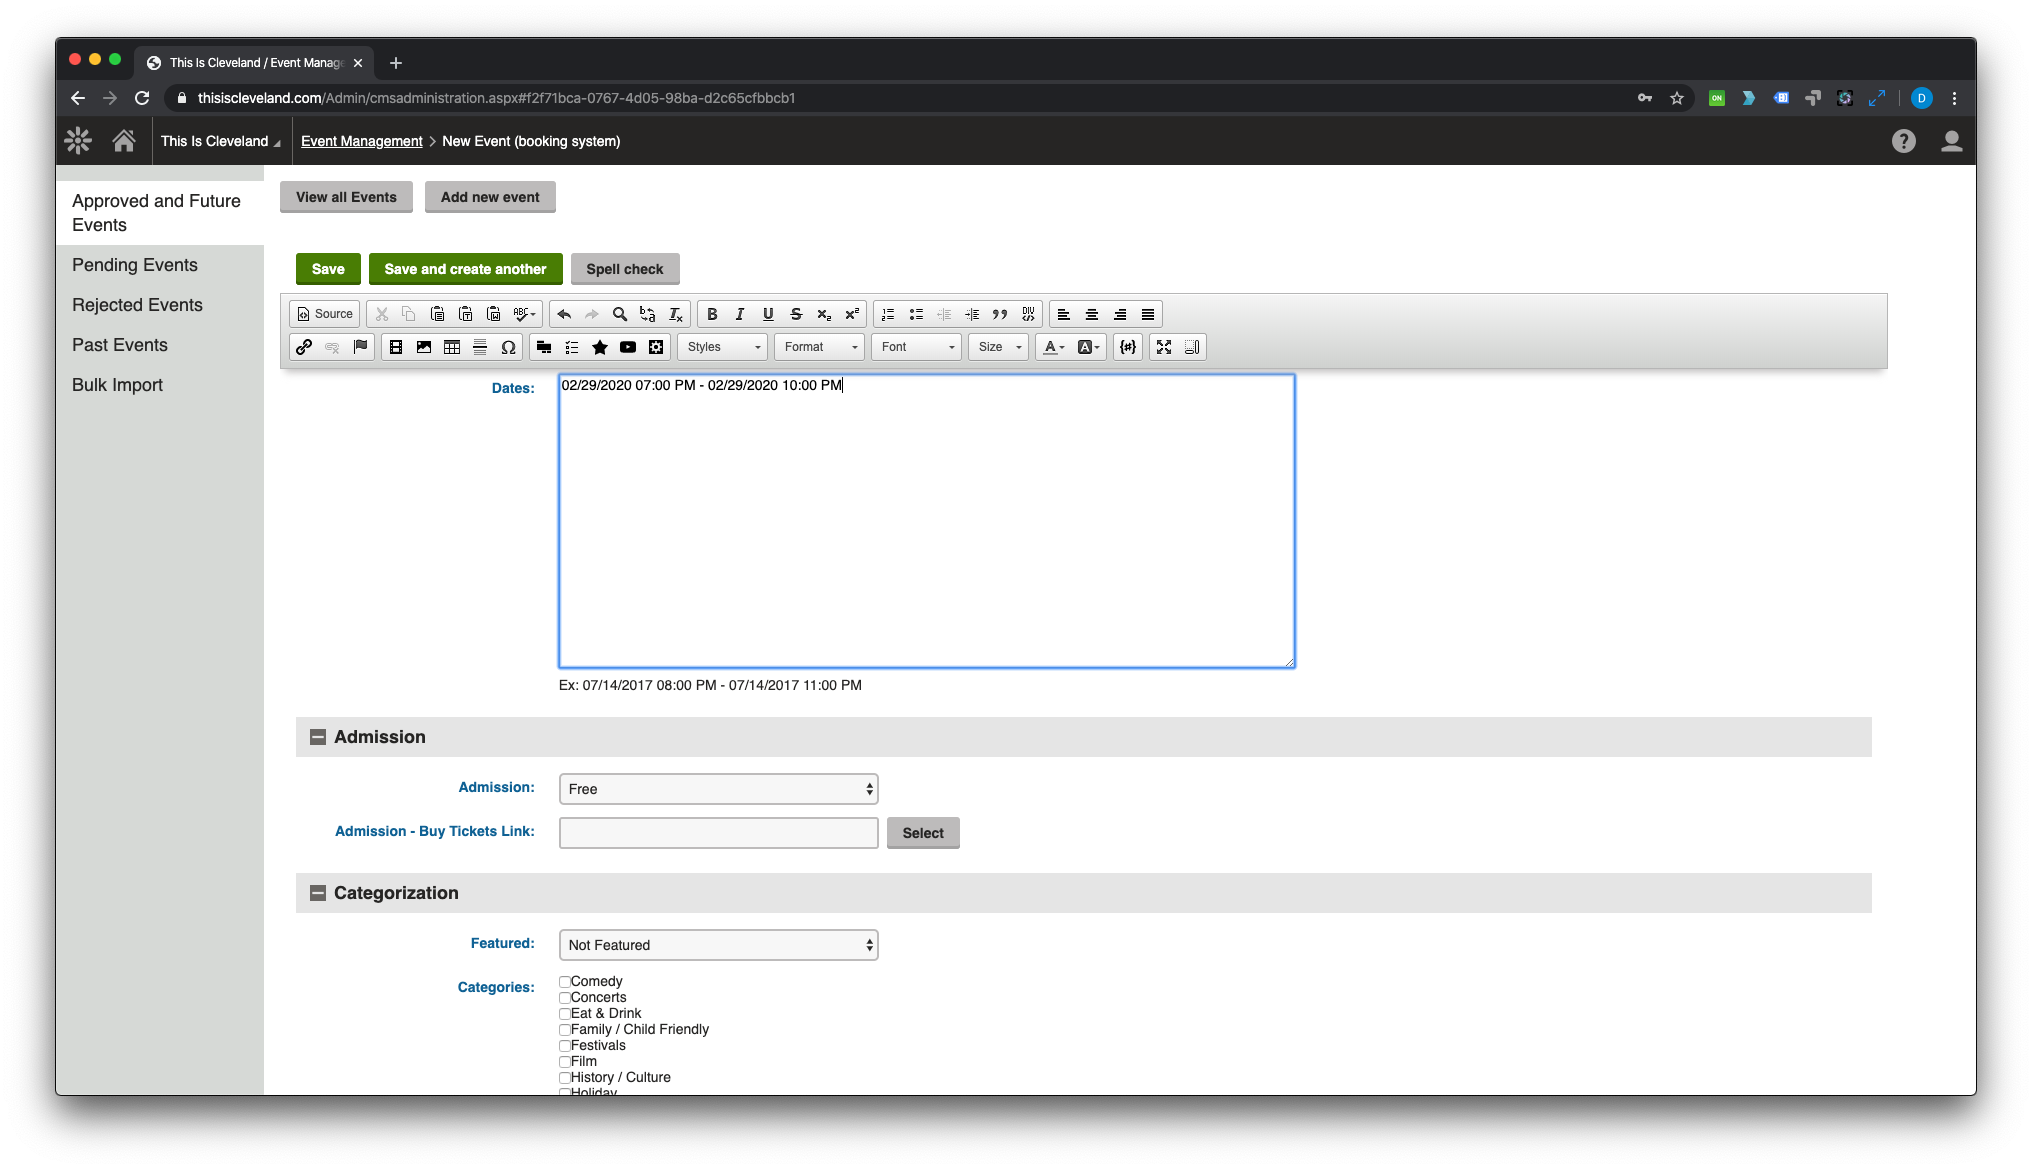
An event needs both a start and end date and time and it should be entered in the following format:
MM/DD/YYYY HH:MM AM/PM - MM/DD/YYYY HH:MM AM/PM (ex: 01/01/2020 10:00 AM - 01/01/2020 1:00 PM)
If the event occurs multiple times in one day, on multiple days, or both enter the dates and times for each occurrence of the event (see image below).
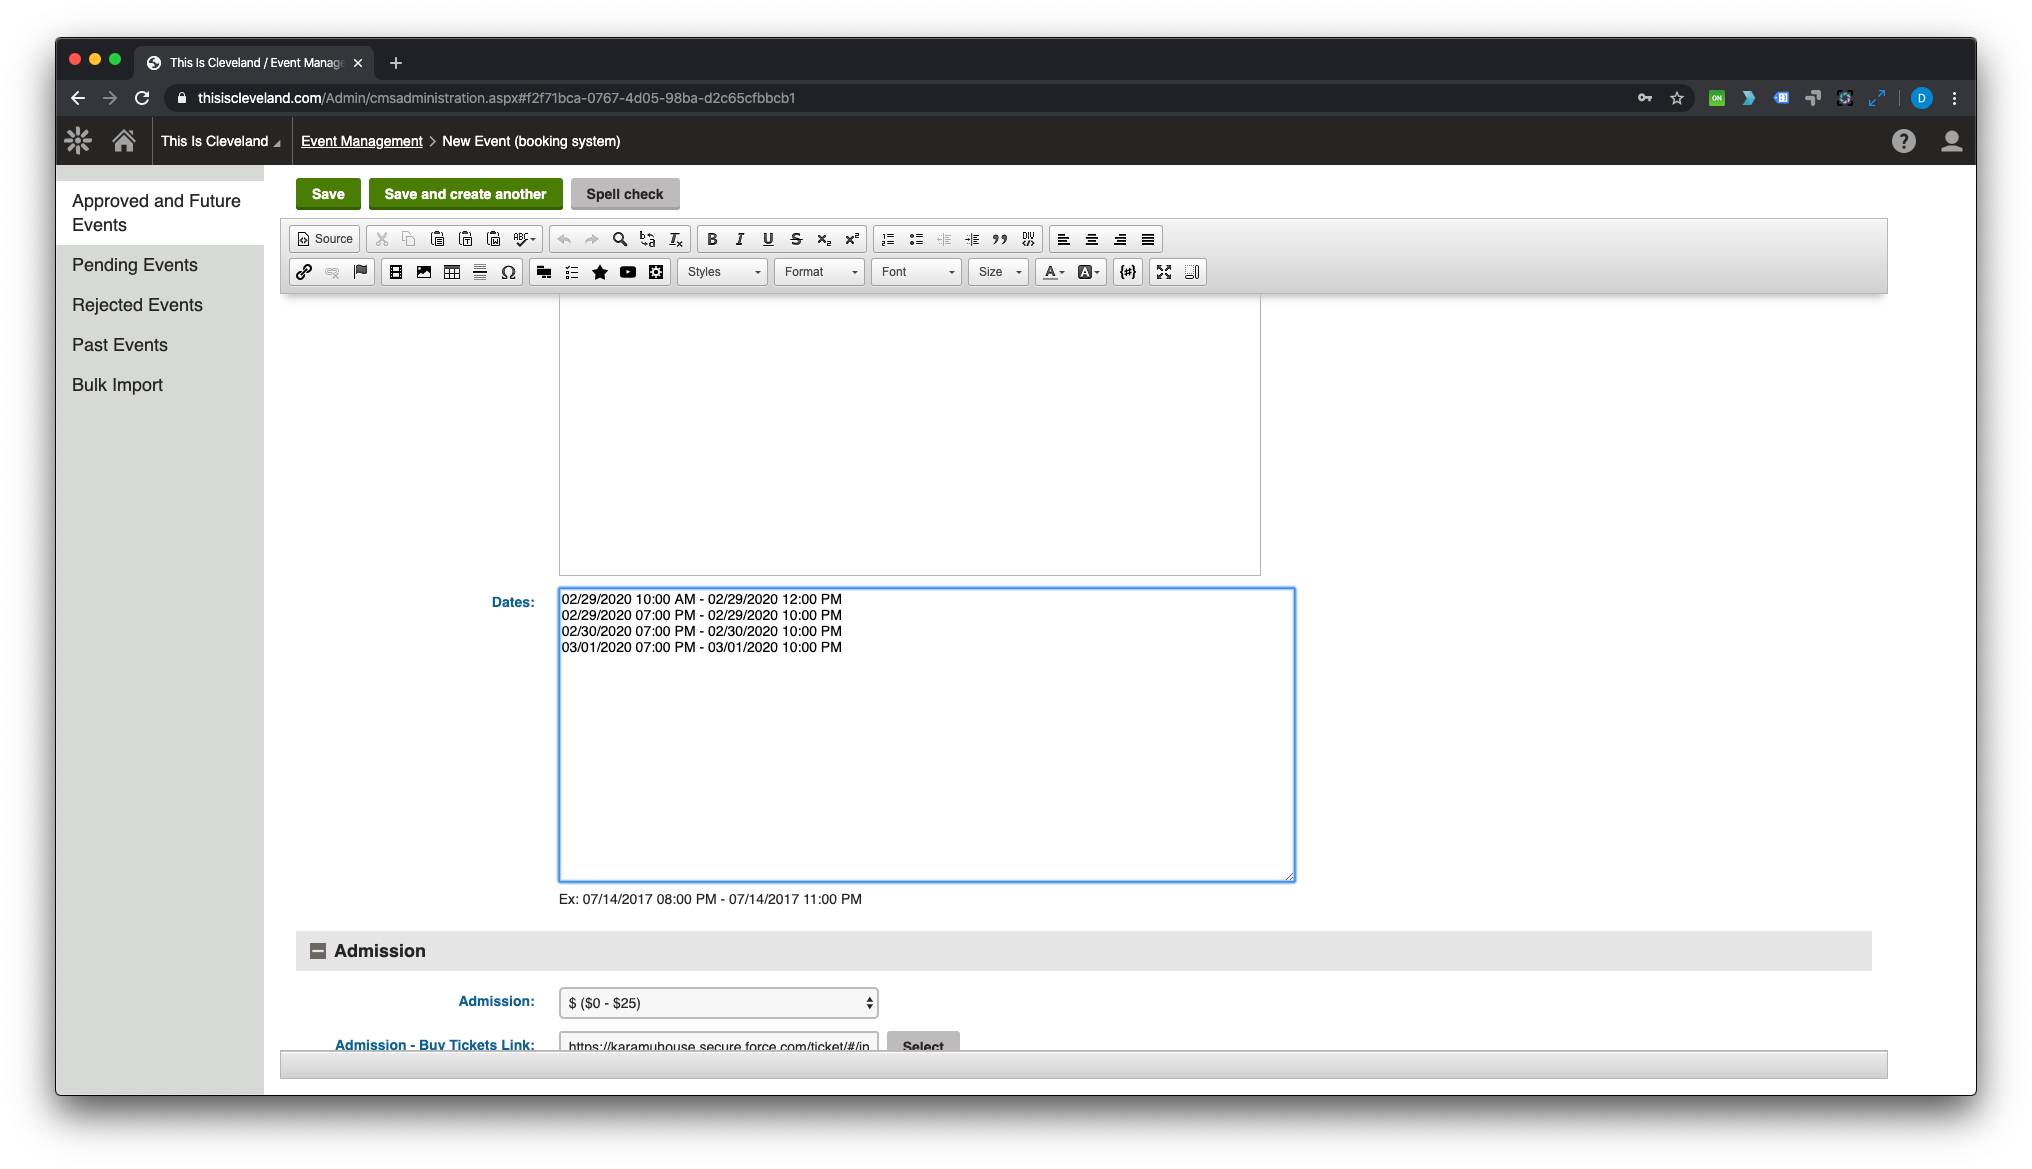
5. If applicable, select / enter event admission (red).
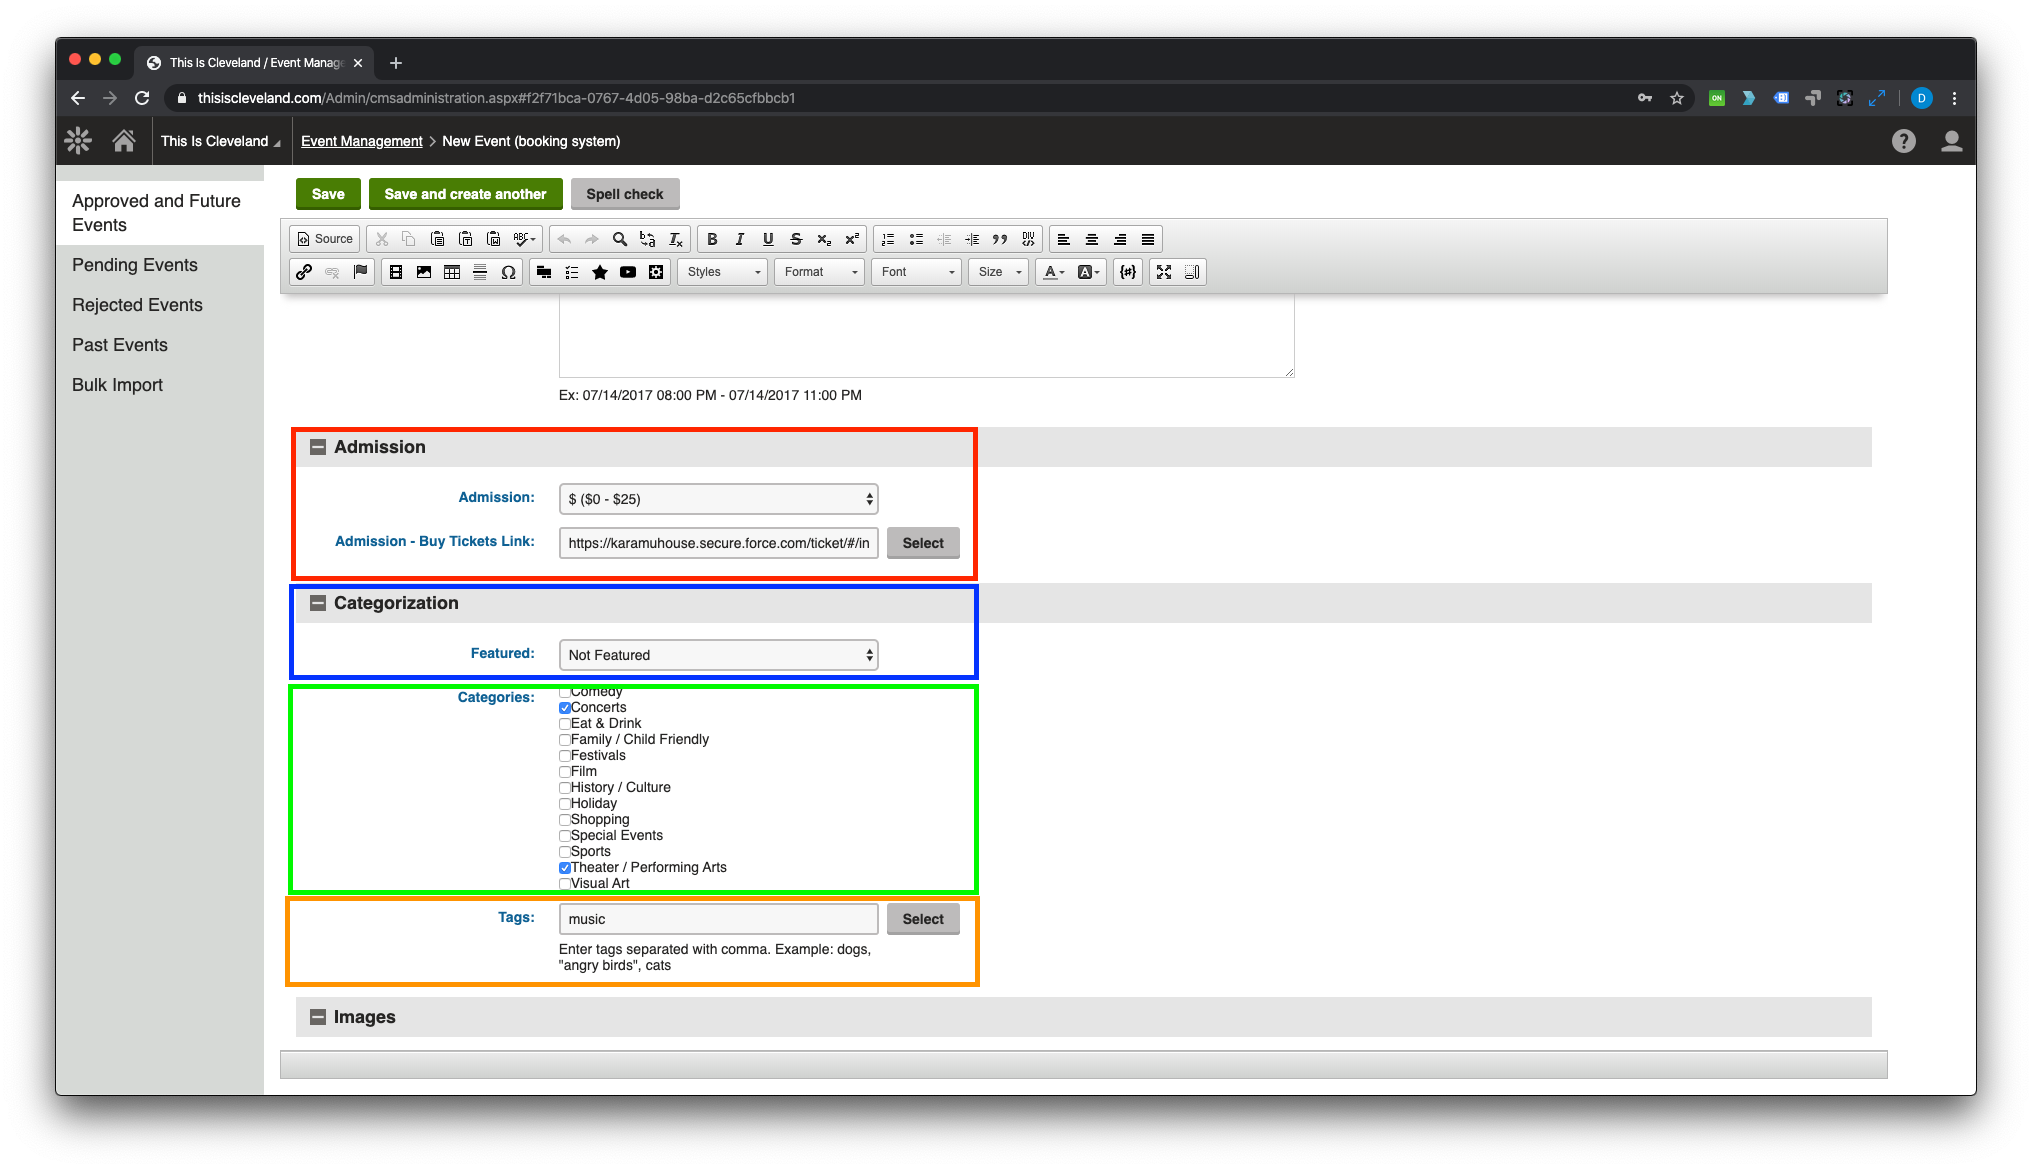
Select the appropriate amount for the admission price range (if applicable) for the event.
Add a URL directly to the site for users to purchase tickets for the event (if applicable).
Don't forget to include http:// or https:// in the URL (ex: https://www.thisiscleveland.com).
6. If applicable, select if the event should be featured (blue).
After marking the event as featured a new field will appear to select the "Featured Banner" image (ex: see red in image below).
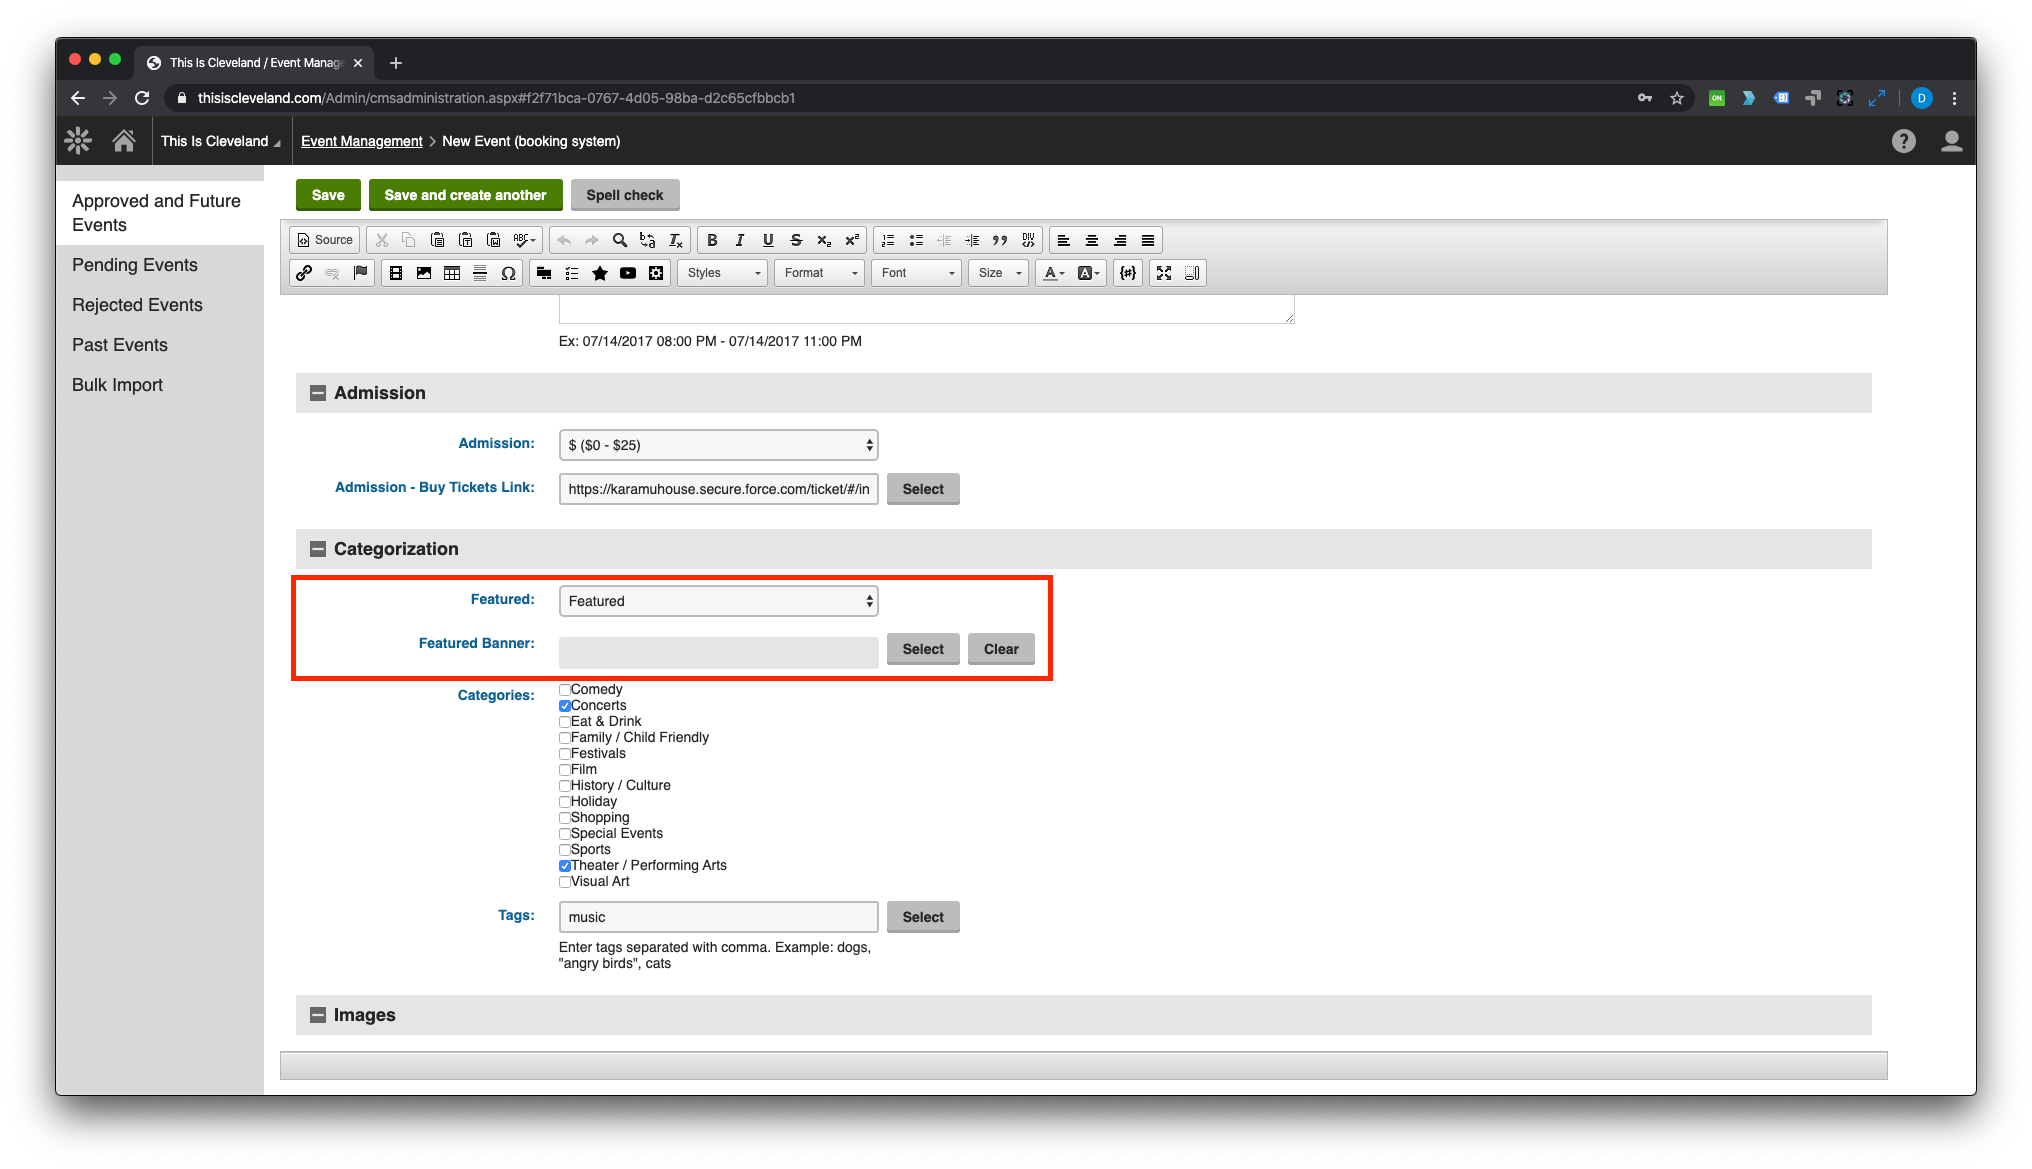
To upload a new banner image click the "Select" button to open the media selection window (ex: see image below)
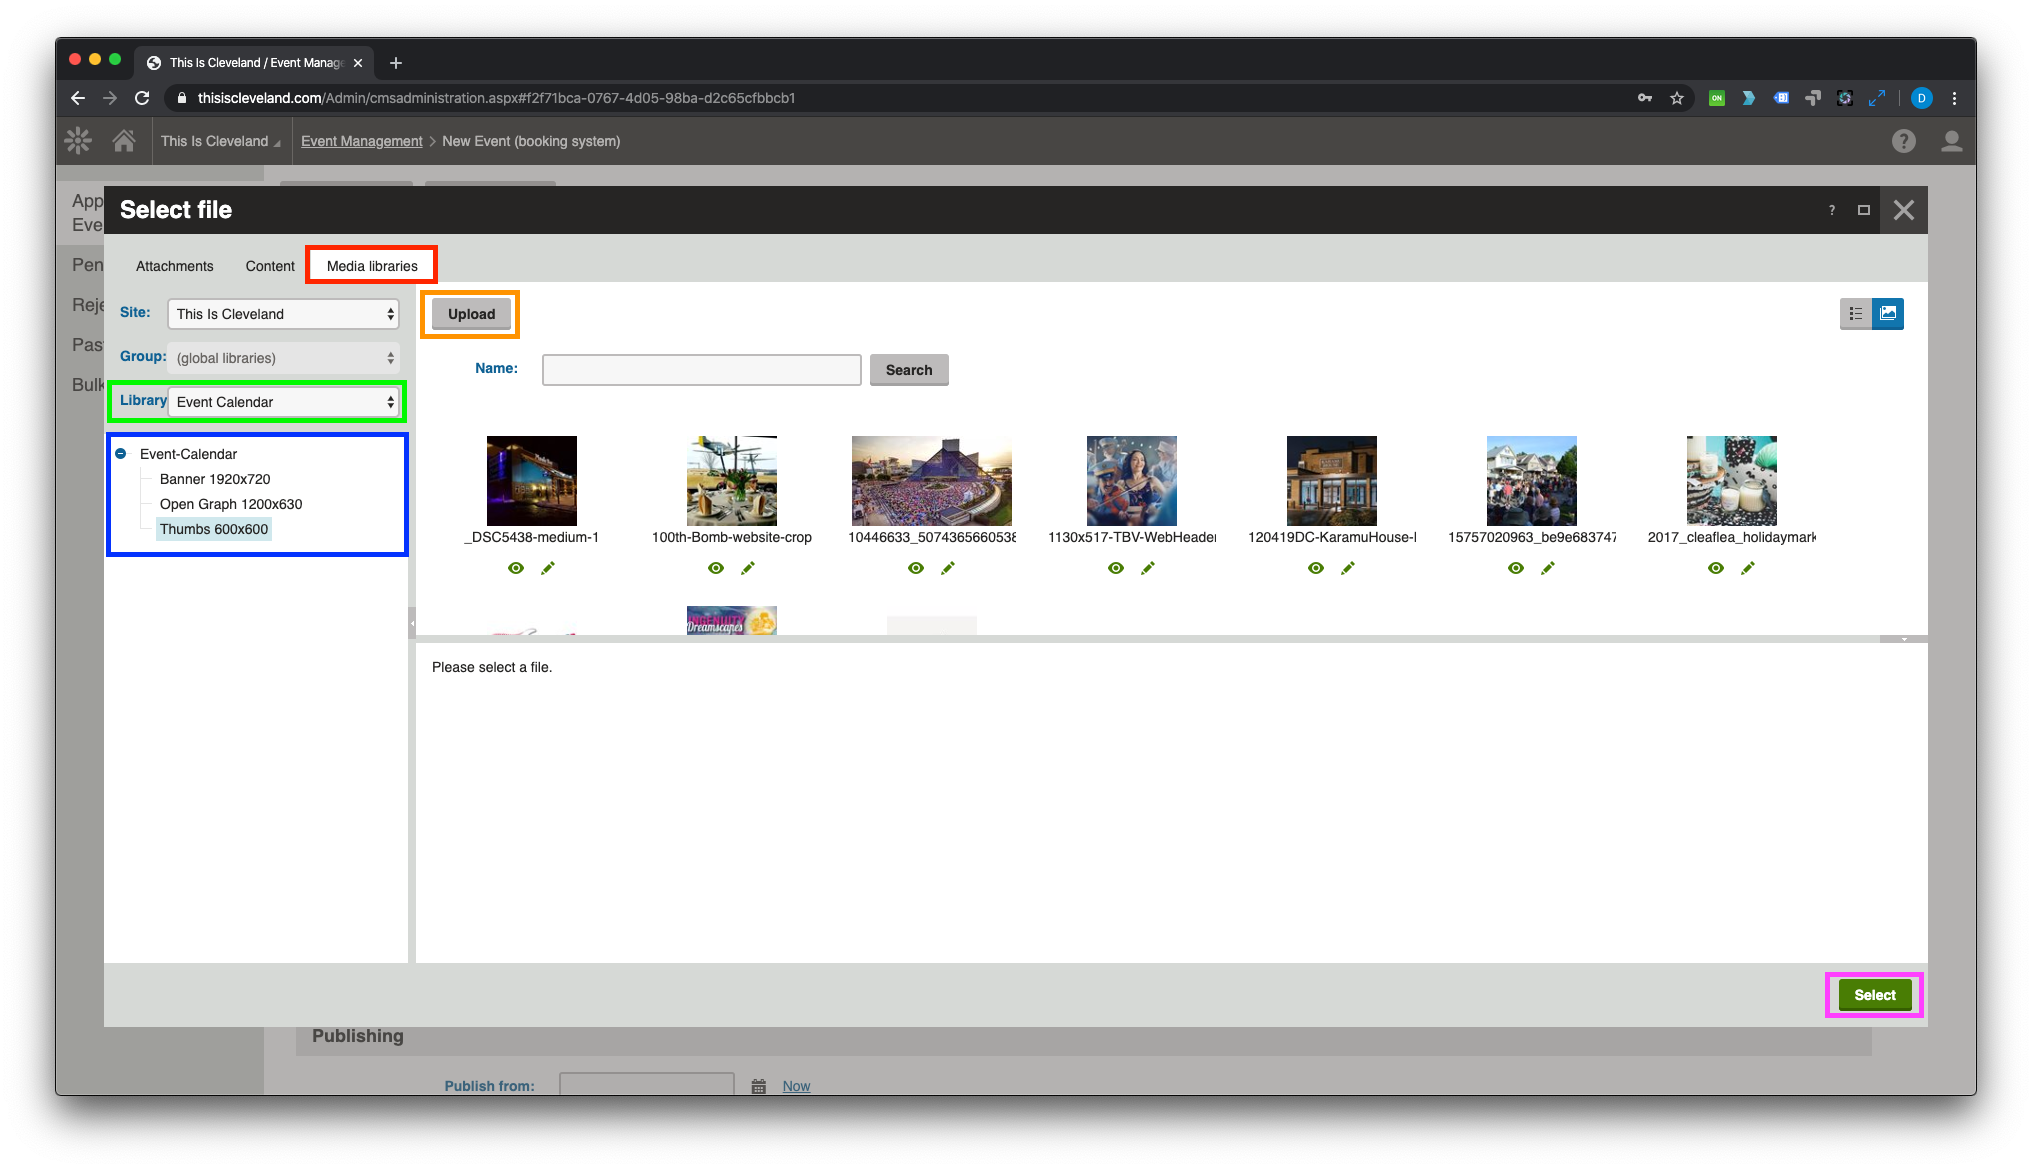
Click on "Media libraries" (red) in the top left of the media selection window and make sure that "Event Calendar" is selected for Library (green).
Click on the appropriate sub-folder in the folder tree (blue) for the image that you will be uploading.
Click the "Upload" button and a file browser will open to select the image on your computer that you'd like to upload. After selecting the image it will be uploaded and will appear as the selected image in the media selection window.
Click the "Select" button (purple) in the lower right to select the image.
7. Select the appropriate categories that the event should be included in on the website (green).
8. Select the appropriate tags for the event (orange).
Click on the "Select" button to open the tag selector window.
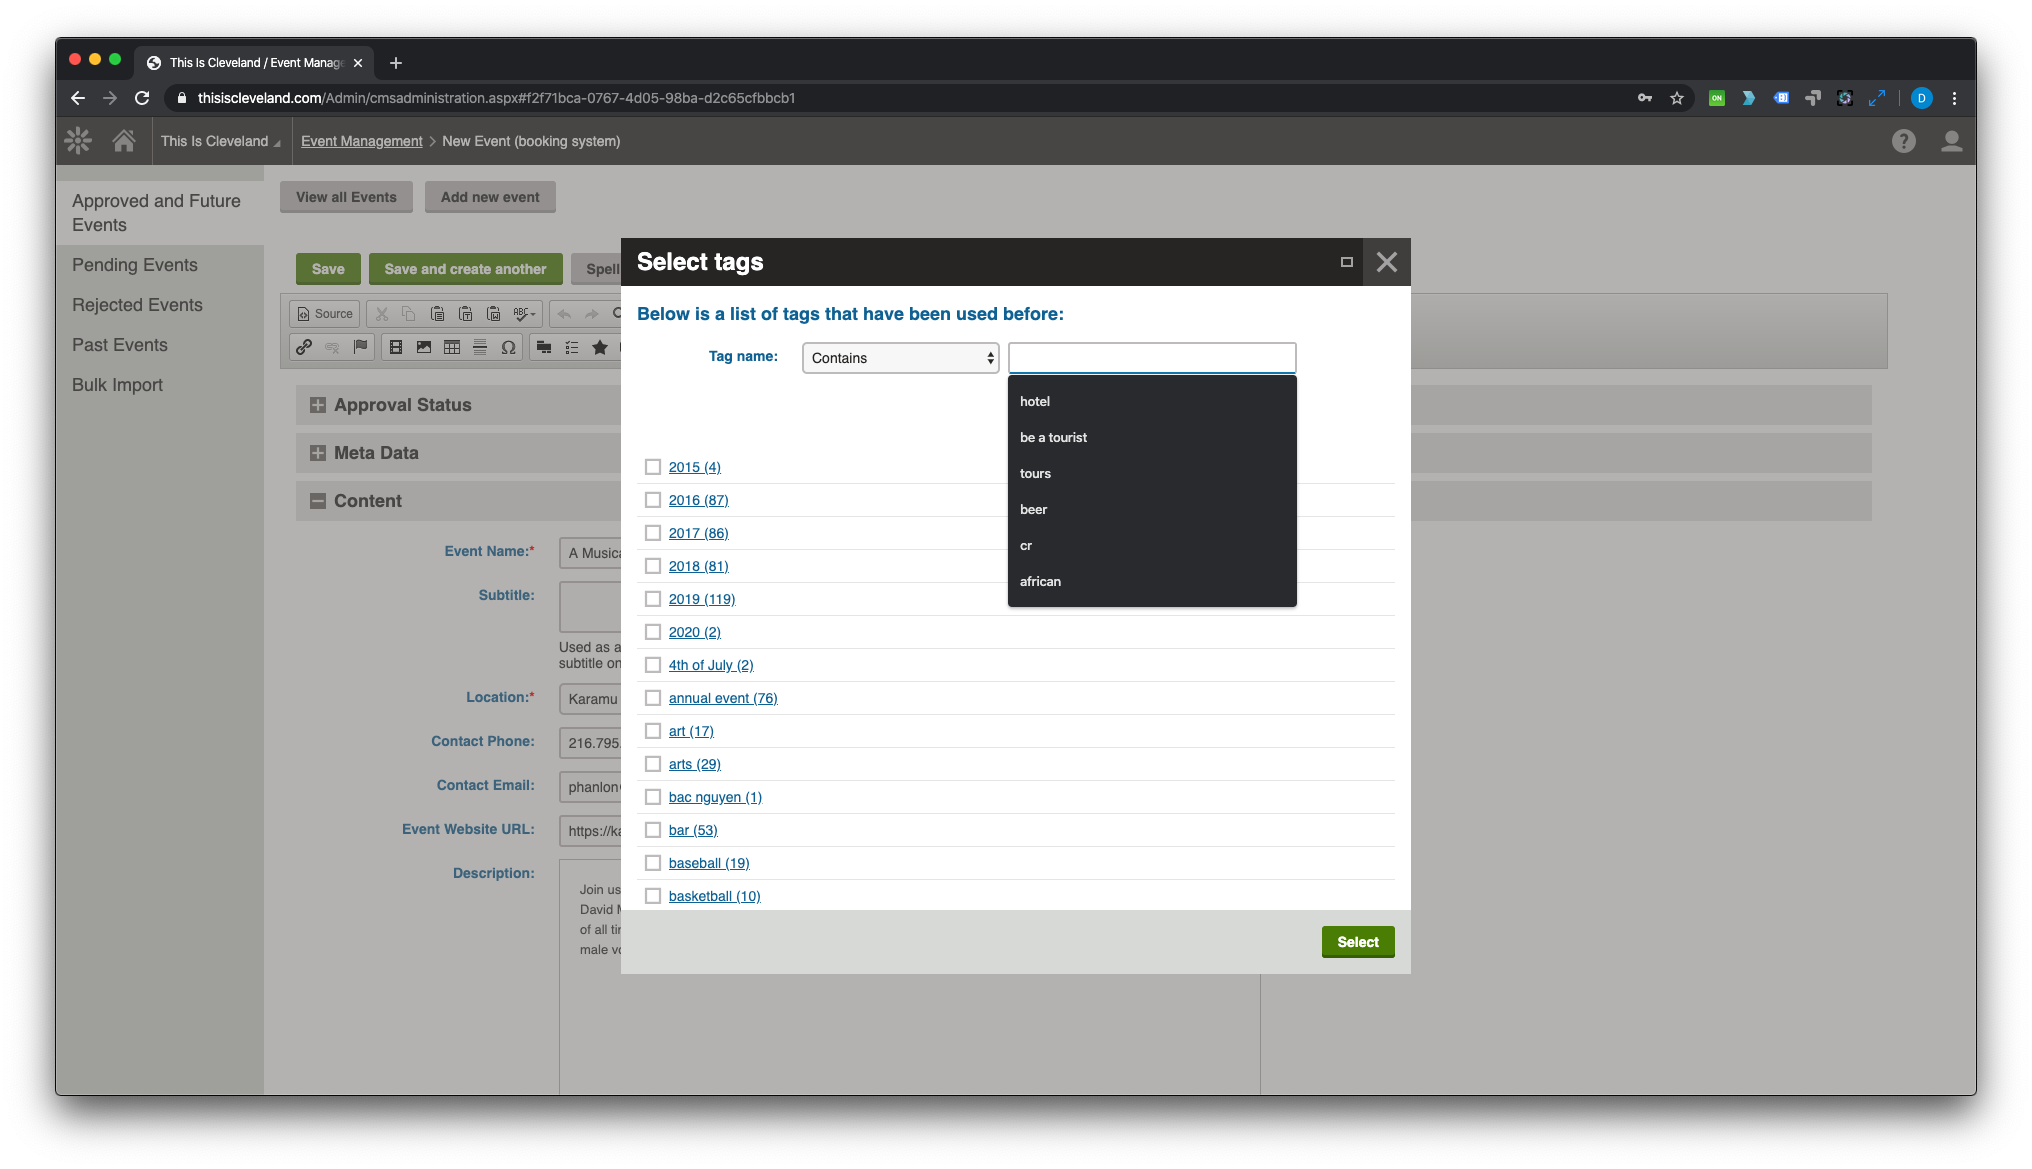
Select tags from the list by clicking the checkboxes next to the appropiate tags. Once you're finished click the "Select" button in the lower right of the window to select the checked tags.
9. Select the Thumbnail and Open Graph images (red) for the event.
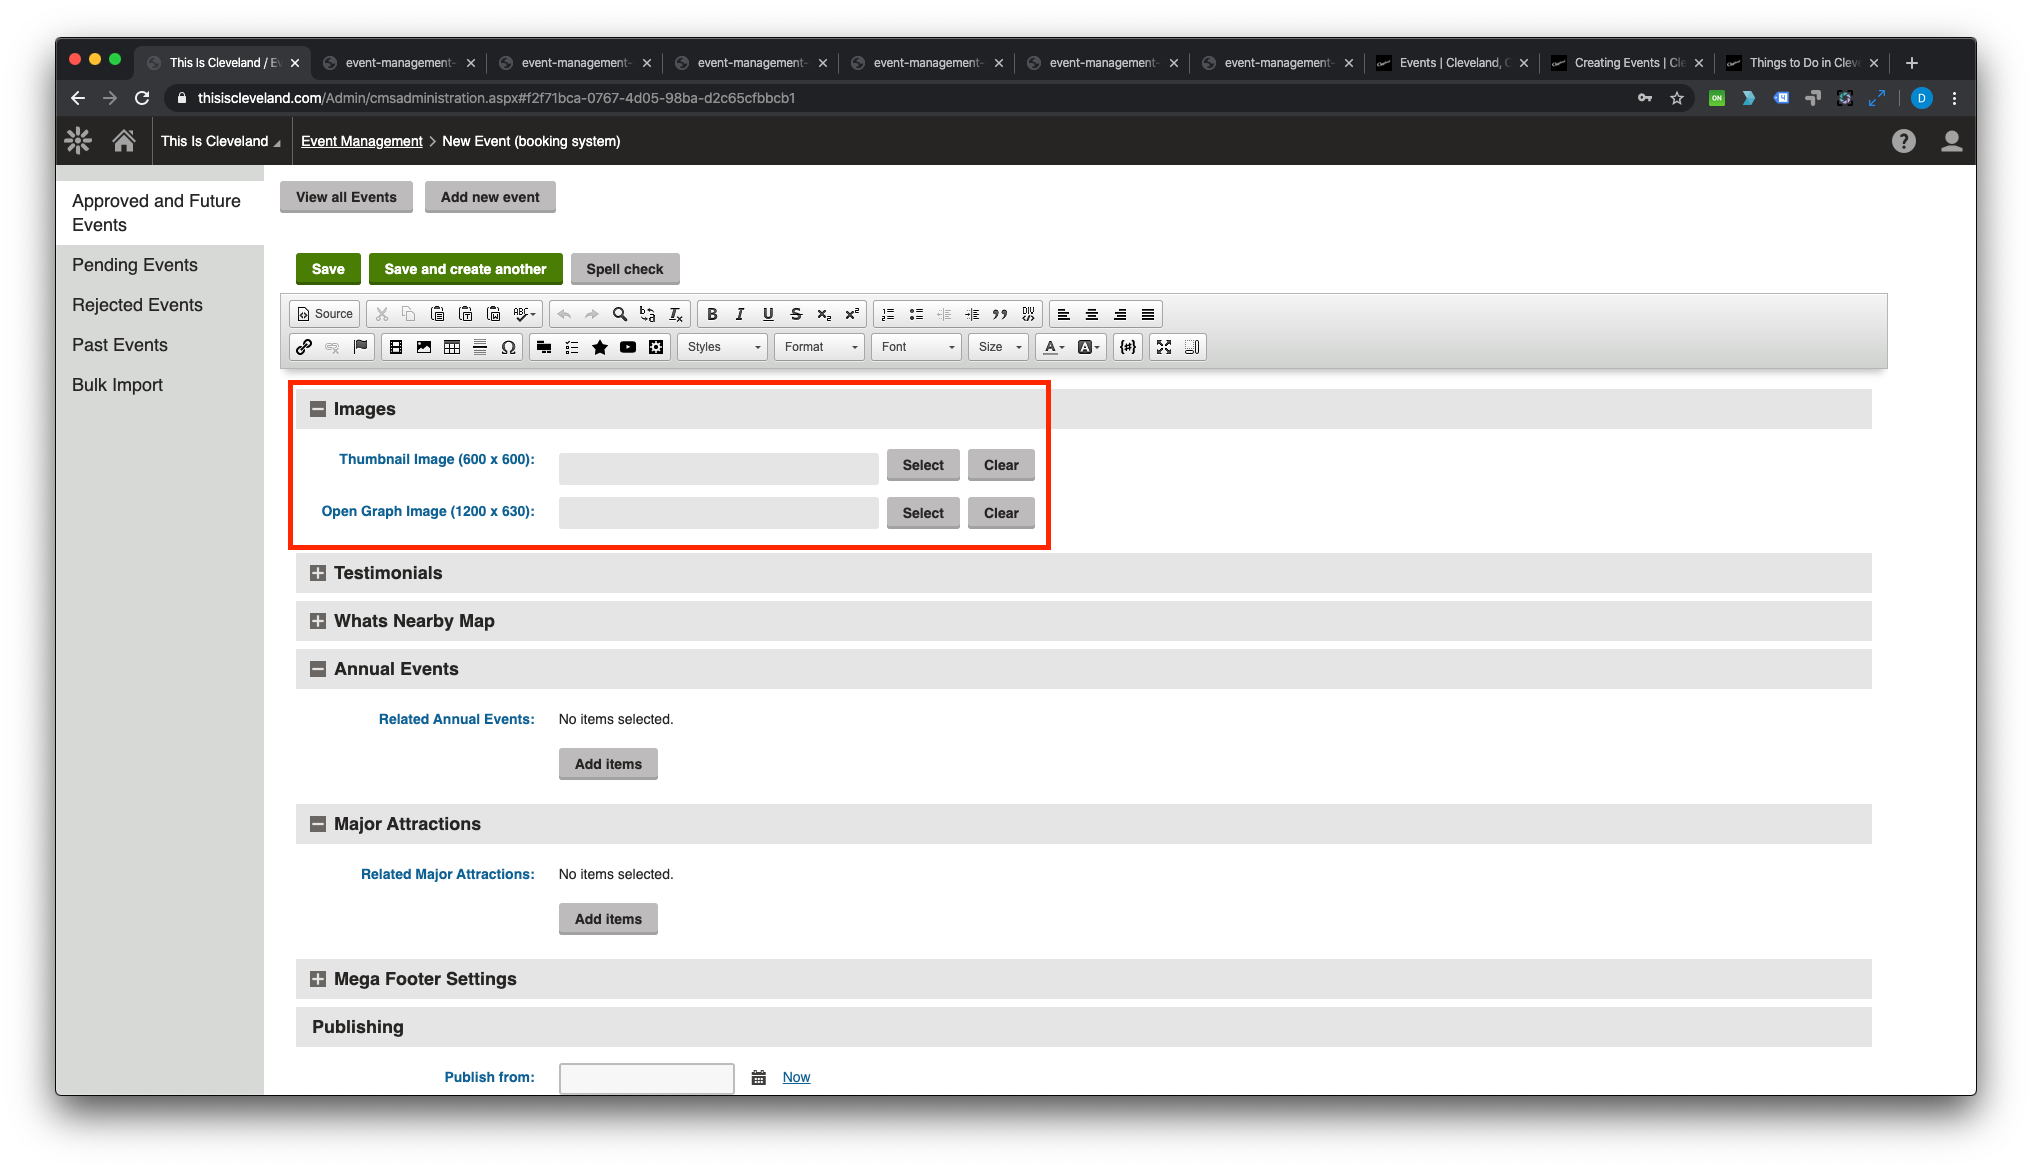
Follow the same instructions for selecting the "Featured Banner" image from Step 6 for these images.
10. If applicable, associate the event with the appropriate annual event (red) and / or major attraction (blue).
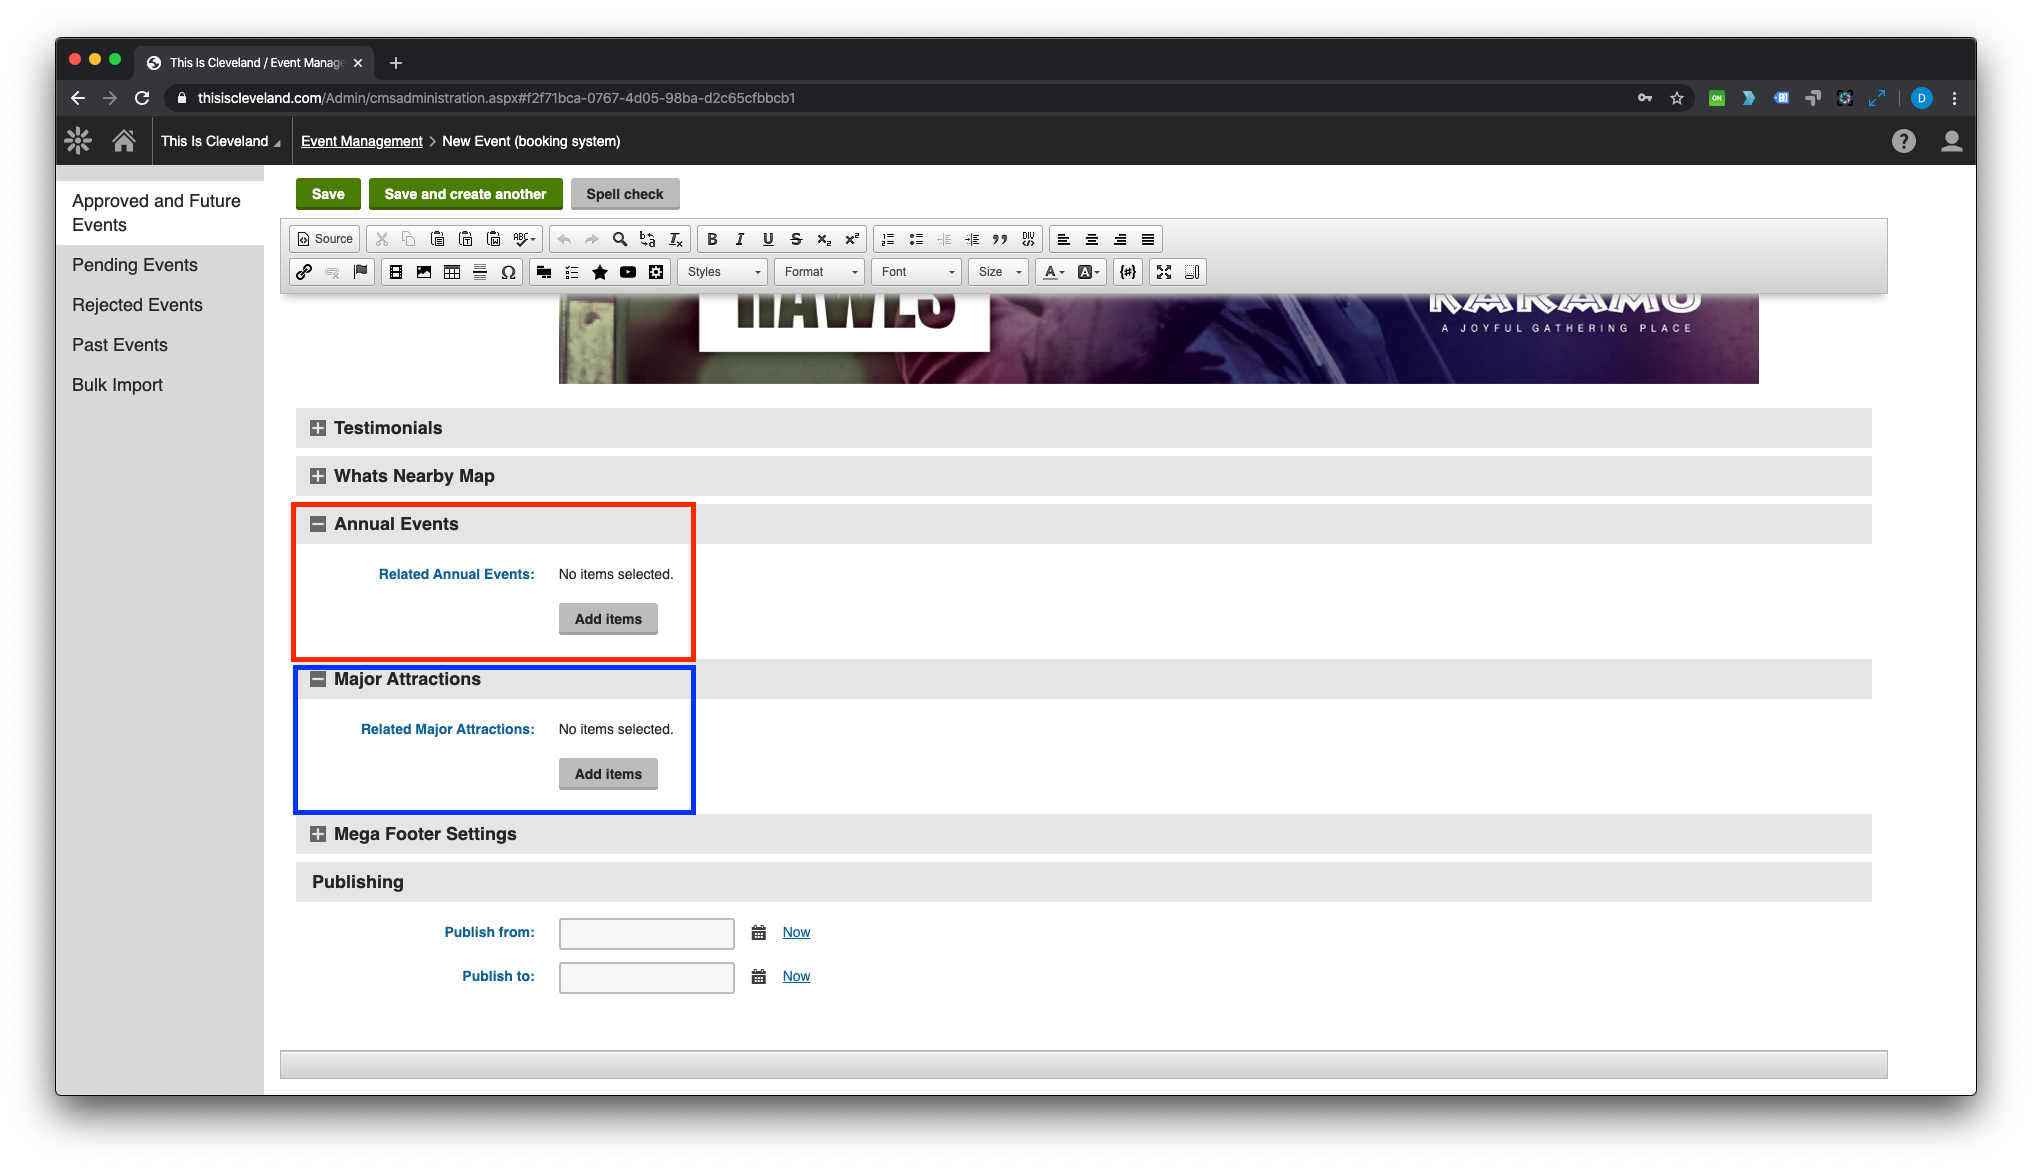
| Annual Event | Is the event part of one of the featured annual events located here? If so click on the "Add items" button and select the appropriate annual event from the list. |
| Major Attractions | Does the event take place at or featured one of the featured major attractions located here? If so click on the "Add items" button and select the appropriate major attraction from the list. |
11. Save the event.
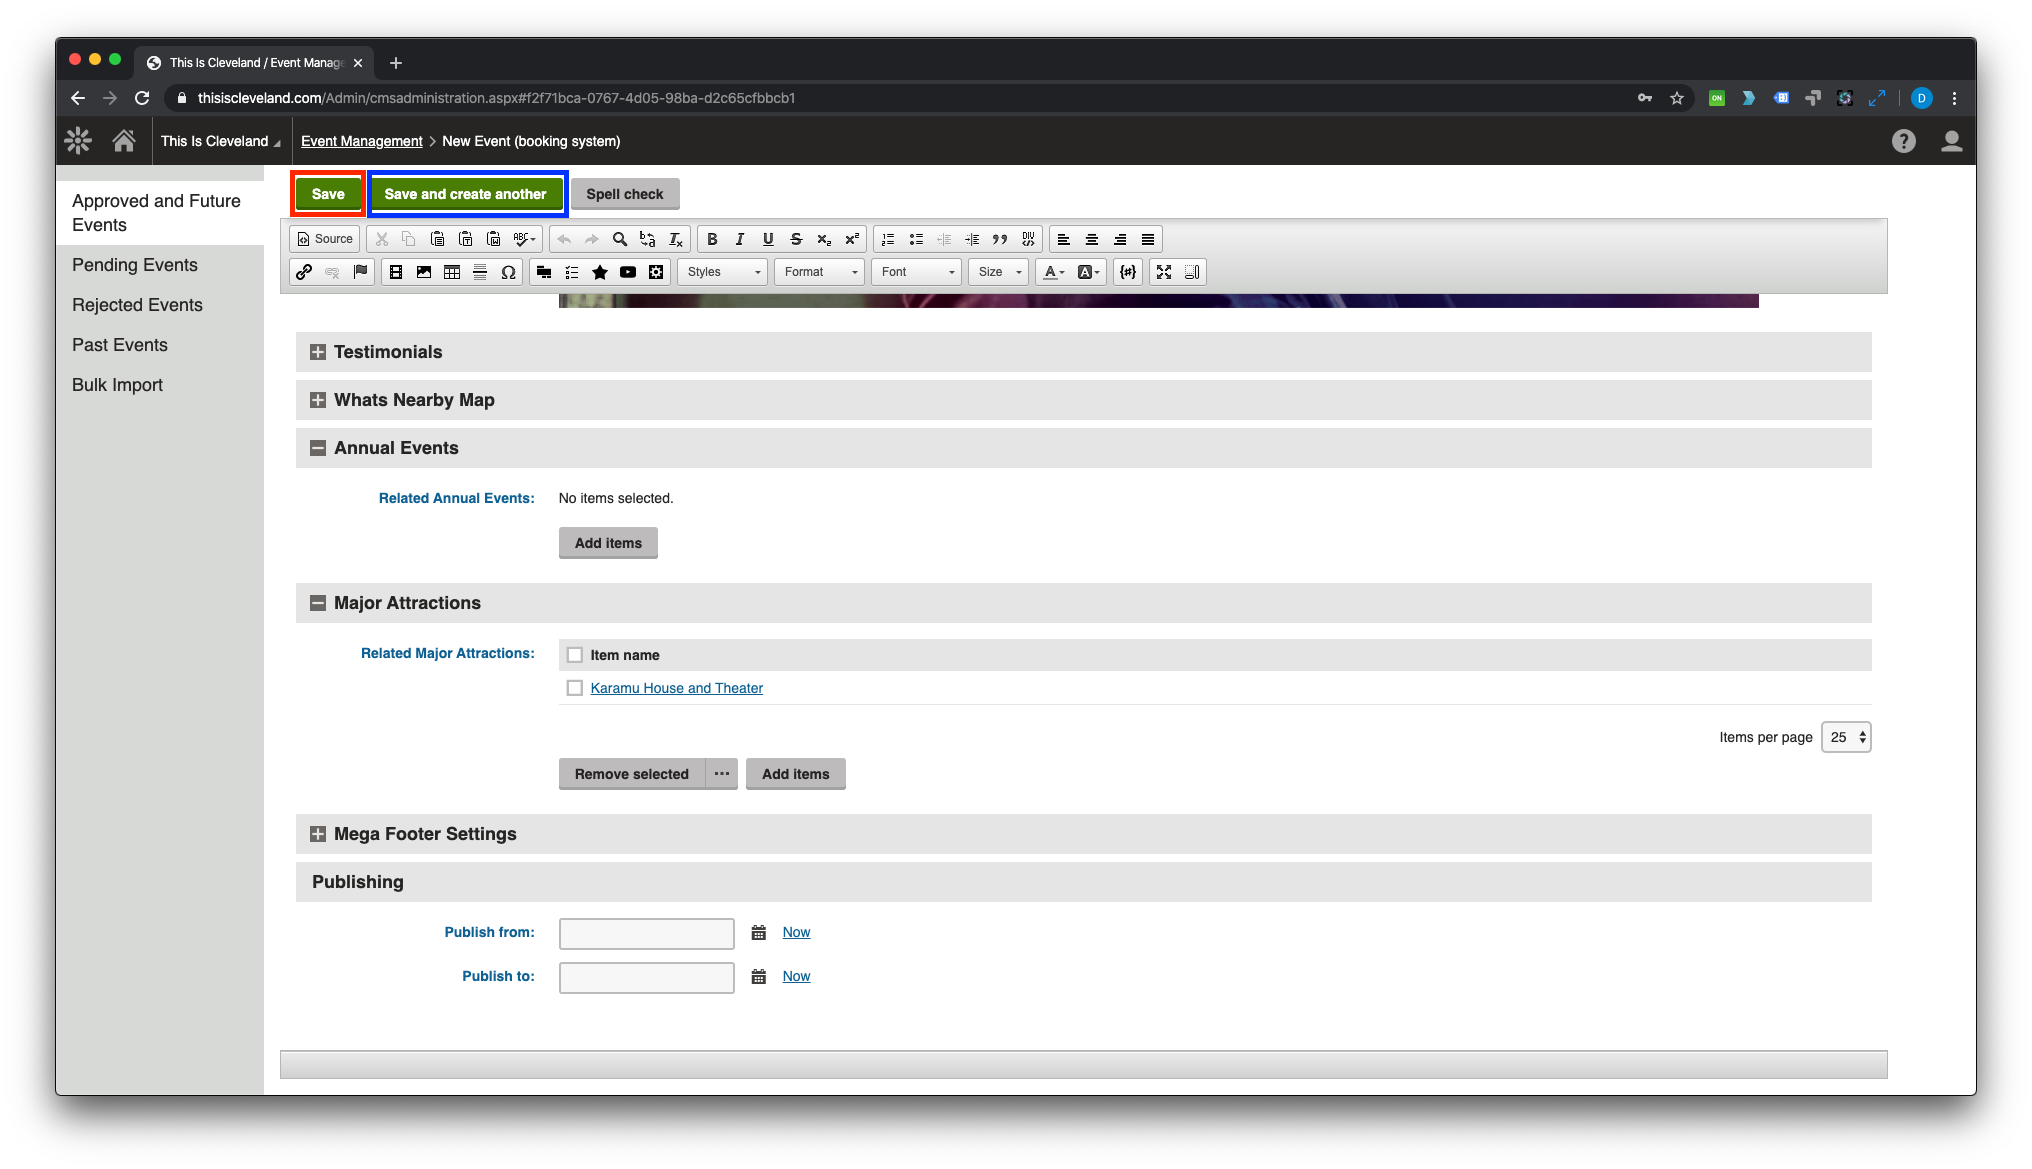
You're all done. If you have another event to create click the "Save and create another" button (blue) at the top of the page otherwise click the "Save" button (red).